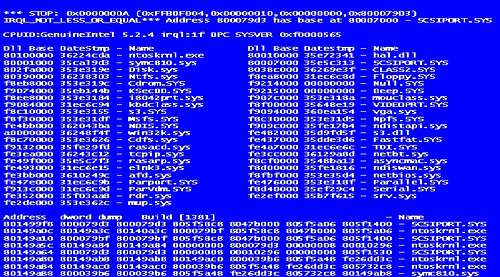
The hard drive of a system or laptop is an integral part and works as a storage organ for the system that is responsible for all the data storage. The problem with hard drive is attributed to different symptoms that include slow working of system, slow loading of data. You may get a blue screen error or bsod error. These are just some of the symptoms of a problematic hard drive. The errors of physical memory or dysfunctioning of other component can a result of a problematic hard drive. There is one very important symptom of a problematic hard drive is crc error that usually occur during transfer of files.
In this error usually the transferring data start but the task bar gets stuck at particular point and keeps it waiting for hours without any progress.
Main causes of problem
The internal hard drive of system as compared to an external drive is less volatile. The external hard disk is solid state drives. The internal hard drives depend upon the quality of manufacturer and its term of degradation i.e. the time before a hard disk is recommended to be used. Even the good quality hard disk gets degraded over a period of time because of bad sectors present in it. These are small areas on the hard disk that cannot be used because of physical damage to it. To prevent further damage, the bad sectors of the hard disk is marked manually by running a process called windows disk checking utility.
Preliminary steps before running a disk checker
The basics steps before running a disk checker are same as the basics step that you take after before doing a major work. The basic process starts with restarting the system or rebooting it. There can be minor problem that need to be solved before starting the process of disk checking. It starts off with systematic shutdown of the system and allowing the internal memory of the system to completely relax and platters to cool down. This will reset the heads and allow it to cool down. It is very necessary to understand the fact that sometimes the problem doesn’t lies in hard drive. The problem sometimes is with one of the files present in the system. The solution to this problem is in fact that the file could be transferred to another drive where it can used to run the app.
Running the disk checker in windows 7
The disk checker utility can be accessed from two locations that are from control panel and accessory option. The all program option is available in start menu. This can even be accessed by “chkdsk/r” command will do the work. This command needs to be confirmed by pressing y and you need to continue by pressing enter multiple times. The ‘/r’ flag present at the end give the retrievable readable data from bad sector. Once you exactly complete this process, the disk check utility this will automatically do requisite the process.
Disk check is computer to regular doctor visit for us. In both case we will be able to diagnose a problem before it takes a wrong turn.
Disclosure: We might earn commission from qualifying purchases. The commission help keep the rest of my content free, so thank you!
